How to Restore a gempkg Package to Mac OneNote Backup and Open a Section in the Package?
Gem Menu for Mac OneNote v18 provides “Package Notebooks to .gempkg Files” and “Restore .gempkg File” features.
Used to pack notebooks that Mac OneNote has opened for use as a backup.
This article explains how to pack notebooks:
How to Package Opened Notebooks of Mac OneNote as .gempkg Files for Backup?
Below we describe how to recover a .gempkg file.
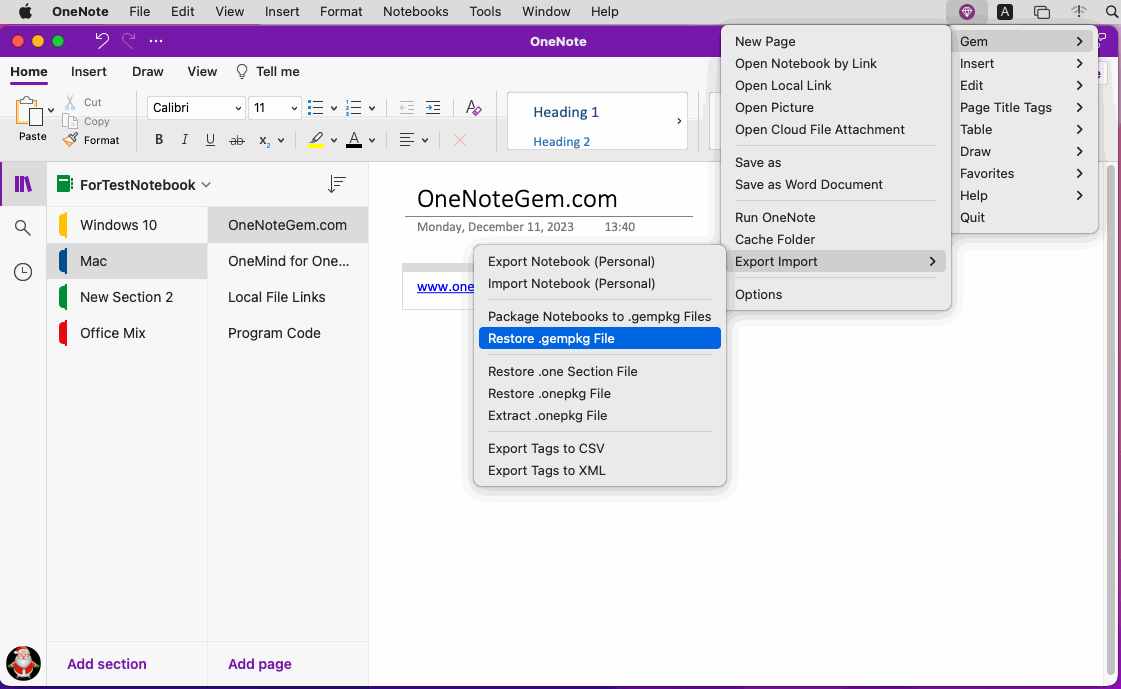
In Gem Menu for Mac OneNote, click “Gem” menu -> Export Import -> “Restore .gempkg File” menu item.
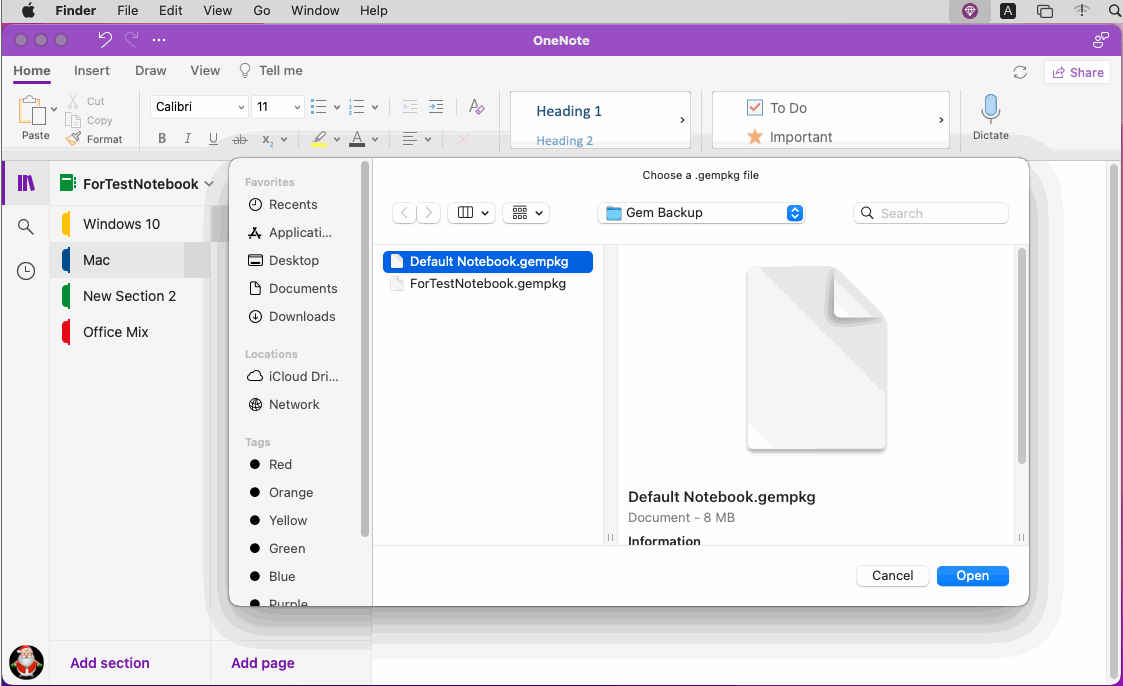
Then, click “open” button.
Gem Menu began restoring the .gempkg file.
In pop up window:
This section needs to be copied to another notebook before it can be edited.
Right-click on the section, and in the context menu that pops up, click the "Copy Section To …" menu item. Copy the section to another notebook.
This allows you to edit the section.

Used to pack notebooks that Mac OneNote has opened for use as a backup.
This article explains how to pack notebooks:
How to Package Opened Notebooks of Mac OneNote as .gempkg Files for Backup?
Below we describe how to recover a .gempkg file.
Gem Menu’s “Restore .gempkg File”
In Gem Menu for Mac OneNote, click “Gem” menu -> Export Import -> “Restore .gempkg File” menu item.
Select a .gempkg File
It will pop up a choose file window, in the window, select a local .gempkg file.Then, click “open” button.
Gem Menu began restoring the .gempkg file.
Open a Section of .gempkg
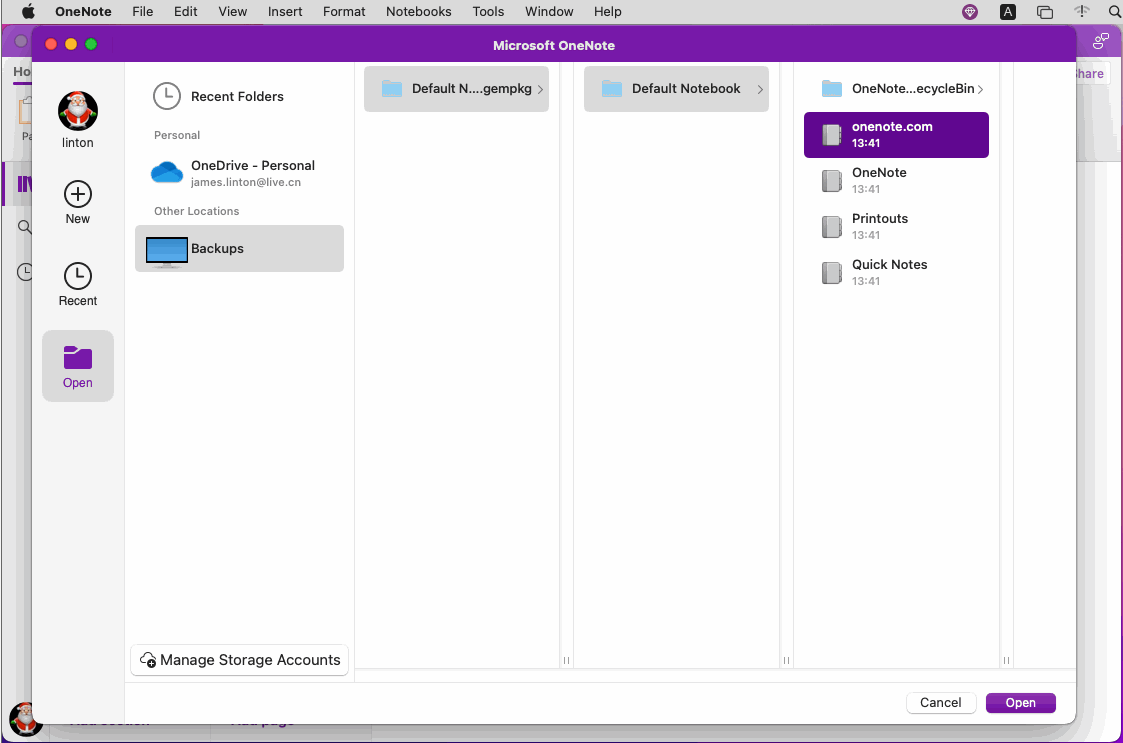
Then, in OneNote main menu, click “File” menu -> “Open” menu item.In pop up window:
- Open
- Backups
- Click ????.gempkg
- Choose a section
- Click “Open” button
Copy Read-only Section to Other Notebook for Editing
Section in .gempkg opened by the above steps are placed in "Open Sections" by OneNote, such section is read-only and cannot be modified.This section needs to be copied to another notebook before it can be edited.
Right-click on the section, and in the context menu that pops up, click the "Copy Section To …" menu item. Copy the section to another notebook.
This allows you to edit the section.