How to Convert a OneNote Notebook Saved on OneDrive.com into a Local Notebook?
Export OneNote Notebook to a .onepkg File
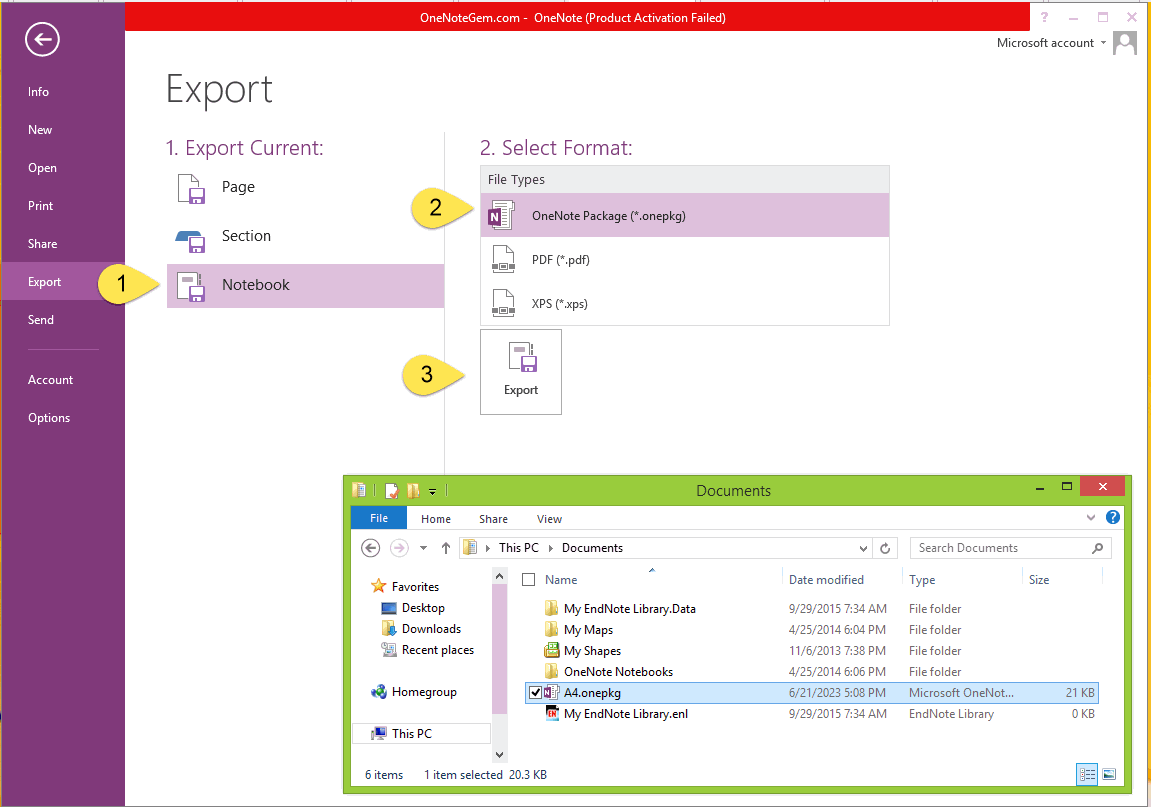
In Windows Office OneNote:Click “File” tab -> “Export”
- “Export Current”: Choose “Notebook”
- Select Format: Choose “OneNote Package (*.onepkg)”
- Finally, Click the big button “Export”.
Finally, we see that we can export the current notebook (the notebook name is A4) as a "A4.onepkg" file.

Double-click to Open the .onepkg and Extract to Created Local Notebook
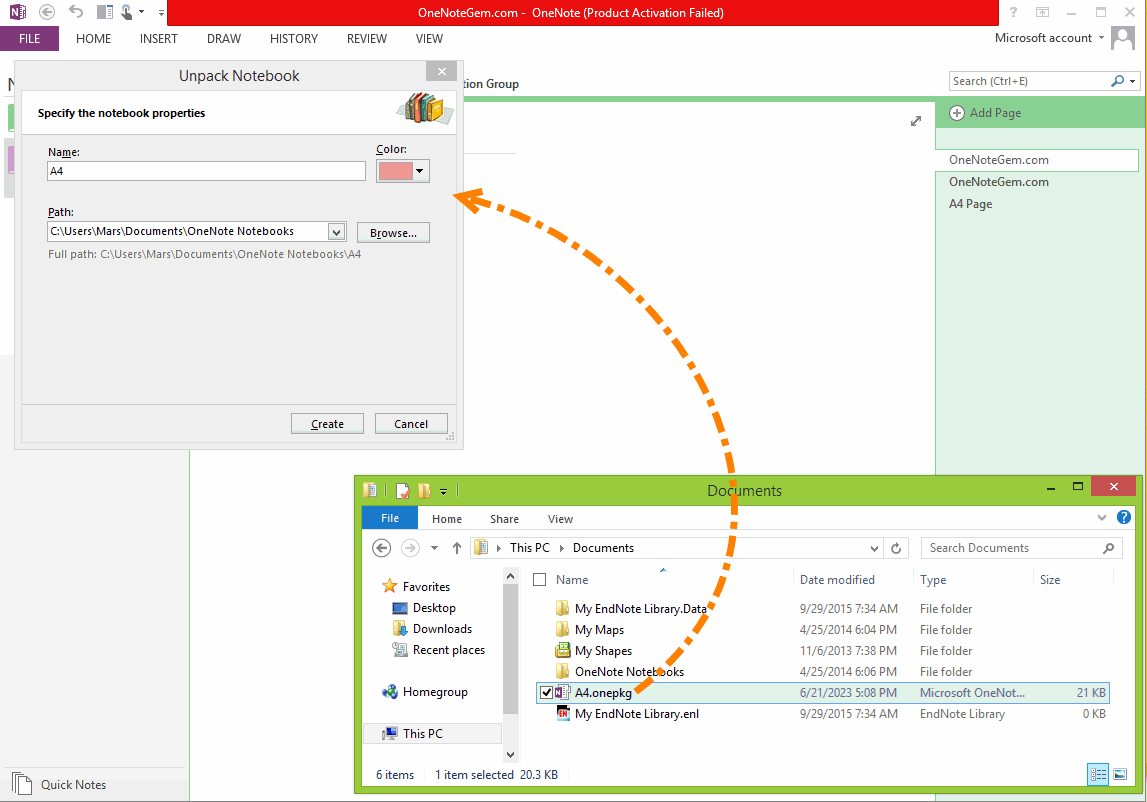
In Windows Explorer, double-click the A4.onepkg file.In the Unpack Notebook window that pops up, specify a local path, or use the default local path.
Then press the "Create" button.

A Local Notebook Named A4
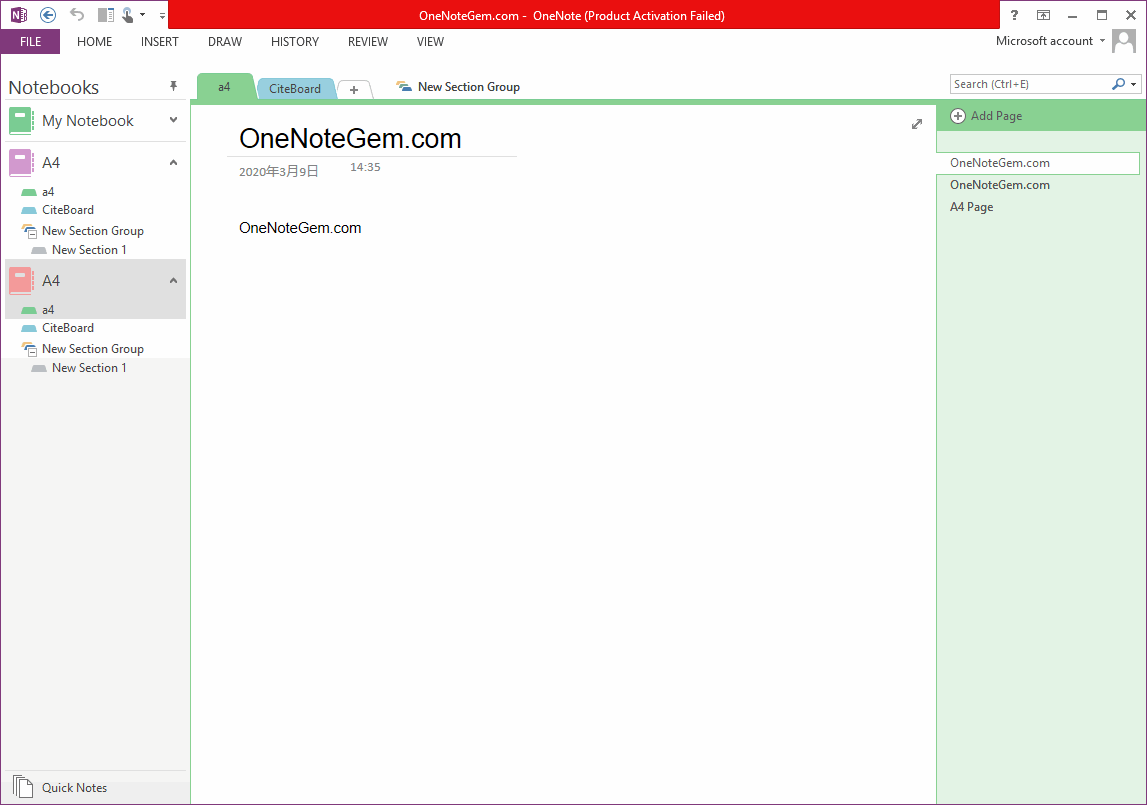
After creation, we can see that there are 2 notebooks named "A4" in OneNote.The first notebook named "A4" is saved in the OneDrive.com, which is the "current notebook" that is used when exporting.
The second notebook named "A4" is the notebook that we double-click A4.onepkg to create.

Delete the A4 Notebook on OneDrive.com
From the steps above, we just seem to copy an A4 notebook to the local computer.
However, OneDrive.com's A4 notebook still exists.
We need to delete the A4 notebook in OneDrive.com:
1. In Windows Office OneNote, right-click the "A4" notebook name. In the right-click menu that pops up, click Close Notebook.
2. Log in to the OneDrive.com with your browser, find the OneNote notebook file named A4, and delete it.