Use Android OneNote Floatie to Quickly Take Photo or Scan into Sticky Notes
2026-10-03 08:29
OneNote Floatie has three main functions:
- Sticky
- Photo
- Scan
This article will tell you more about the Camera and Scan features, including where to tap and how to use them.
Scan feature:
Directly opens your phone's camera. At this point, a purple focus box appears on the screen. After taking the photo, you can extract the text from it, or directly crop the image, and finally save it to Sticky Notes.
Purpose: When you see writing on a whiteboard, a page in a book, or a business card in real life, and want to capture it directly into OneNote. Floatie's camera feature opens your phone's camera directly, and the photo is automatically saved to Sticky Notes without exiting the current app.
How to Use the Scan Feature:
1. Keep Floatie enabled. Once enabled, a purple docking line will appear on the edge of your phone screen.
When you need to take a photo or scan, tap this purple docking line.
Then, a Floatie will pop up on the screen. Tap the [take pictures] icon to take pictures.
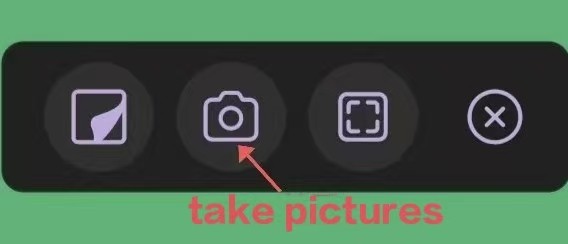
2.After entering the scan interface, Floatie's unique camera mode will be displayed.
Its camera function has a purple focus box (similar to a crop box) to help you capture the key parts, and the central white circle [⭕] is the capture button. See the figure below for details:
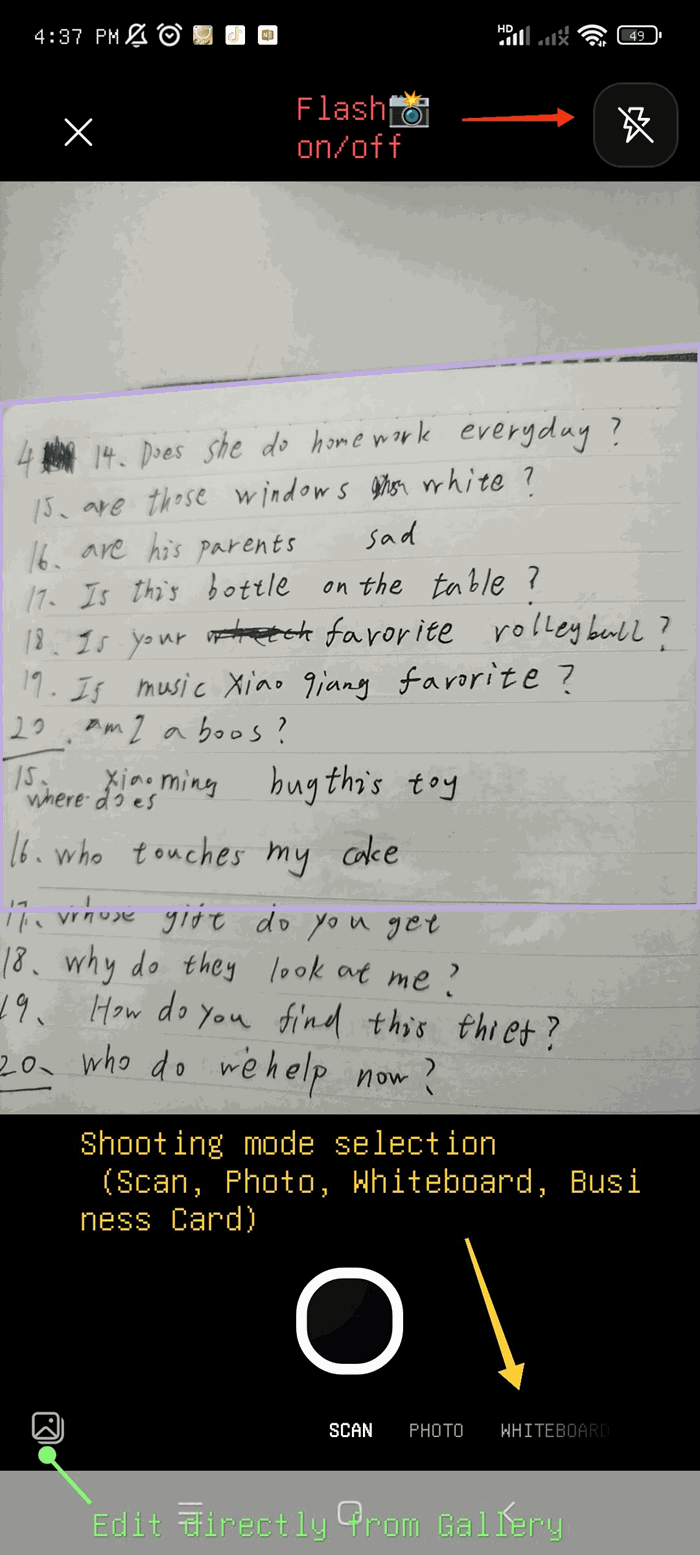
- Top right is [Flash]
- Bottom left is the [Gallery] icon: you can use it directly for editing from your phone album.
- Bottom right is: Scan, Photo, Whiteboard, Business Card ...
3. After tapping the central white circle [⭕] to take a photo, you will enter the editing interface.
(No matter which shooting mode you choose, you will enter this interface after taking a photo.)
As shown in the figure.
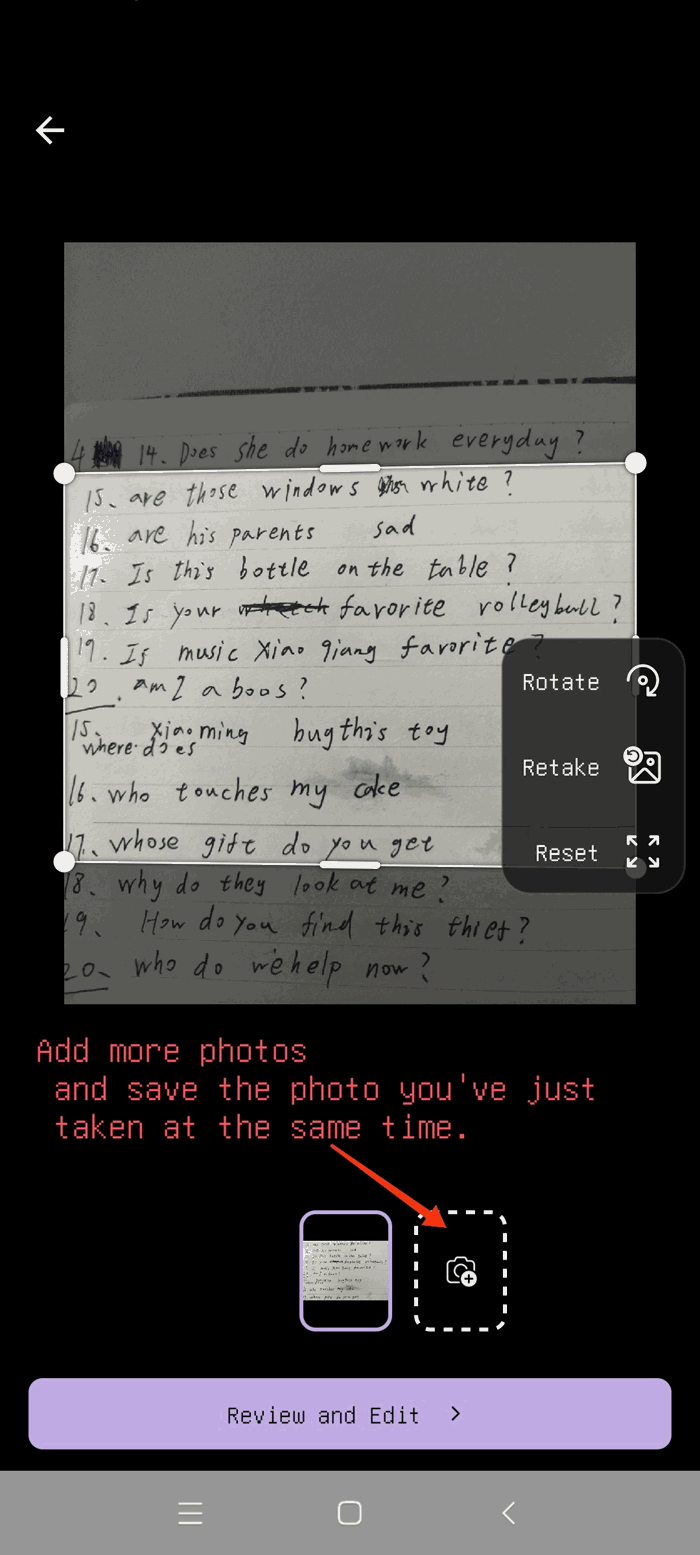
On the right side:
- [Rotate] (rotate the image orientation),
- [Retake] (take a new photo),
- [Reset] (reset settings).
The [Add More Pictures] icon is a camera enclosed by a dotted line.
The above is the first editing step. When you feel you have finished editing, tap [Review and Edit] to enter the second editing interface.
4. When you enter the second editing interface, there are more image editing options available, including:
Crop, Filter.
Tap the [← ]on the right side of the phone screen.
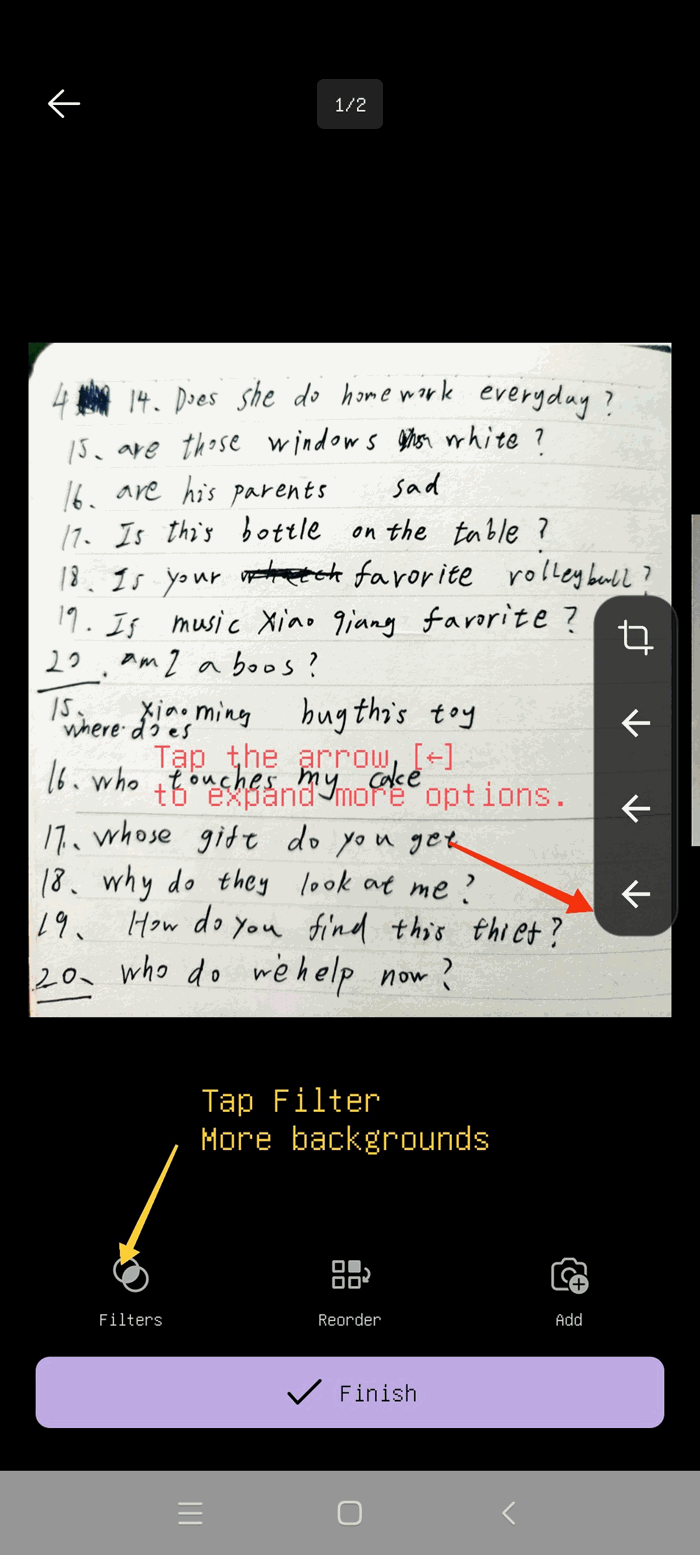
The following options will appear, and you can expand them to see more editing options.
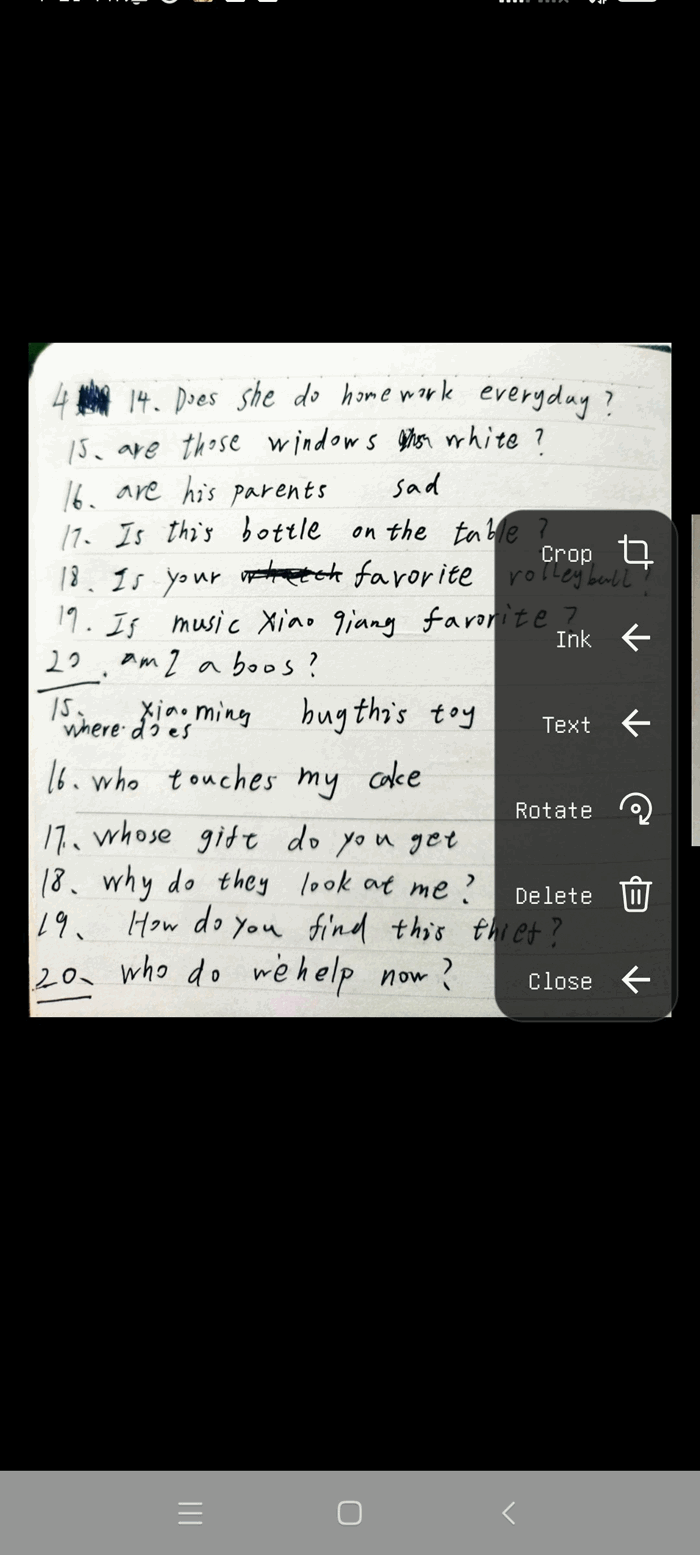
The following options will appear, and you can expand them to see more editing options.
These include [Crop], [Ink], [Text], [Rotate], [Delete], [Close].
(These options allow you to edit the image a second time.)
5. [Filter] refers to changing the background color. The available background colors include [Document], [Black and White], [Gray], etc.
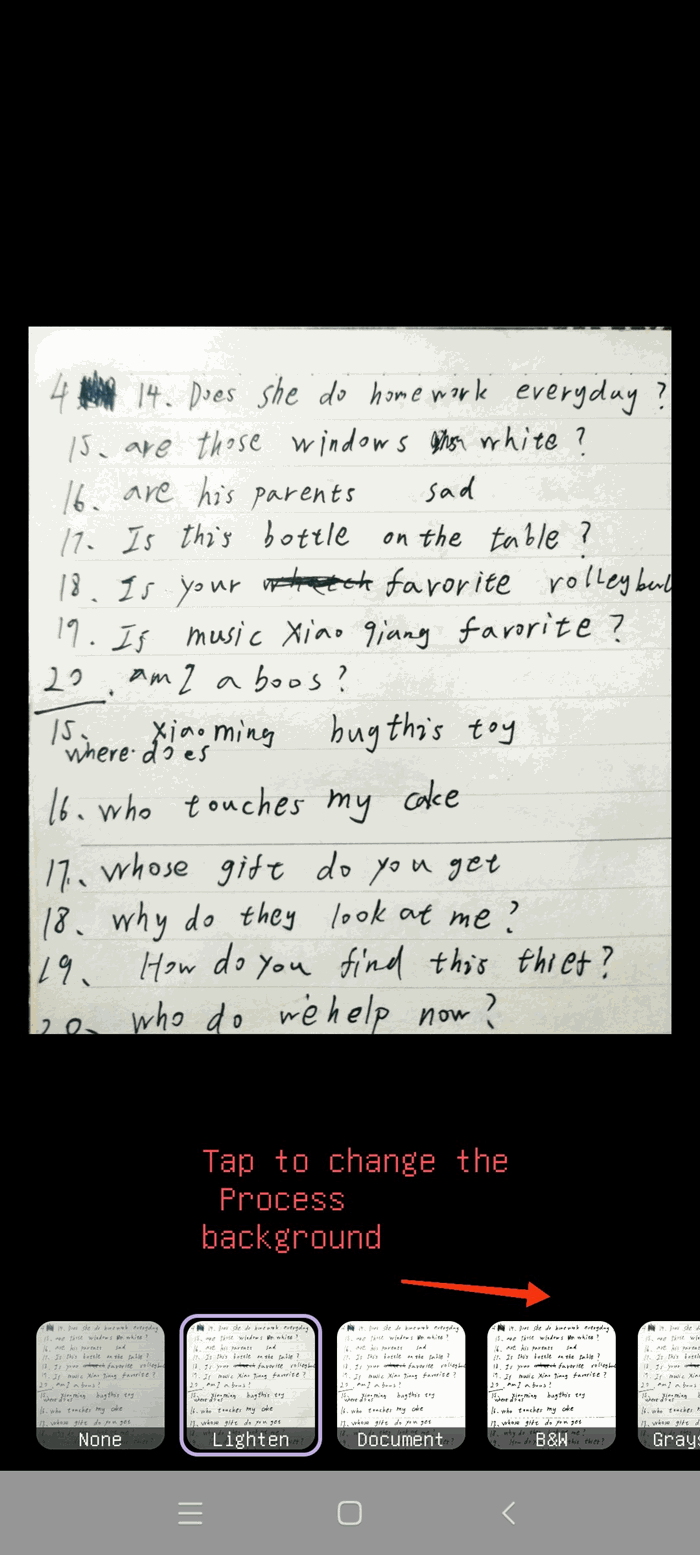
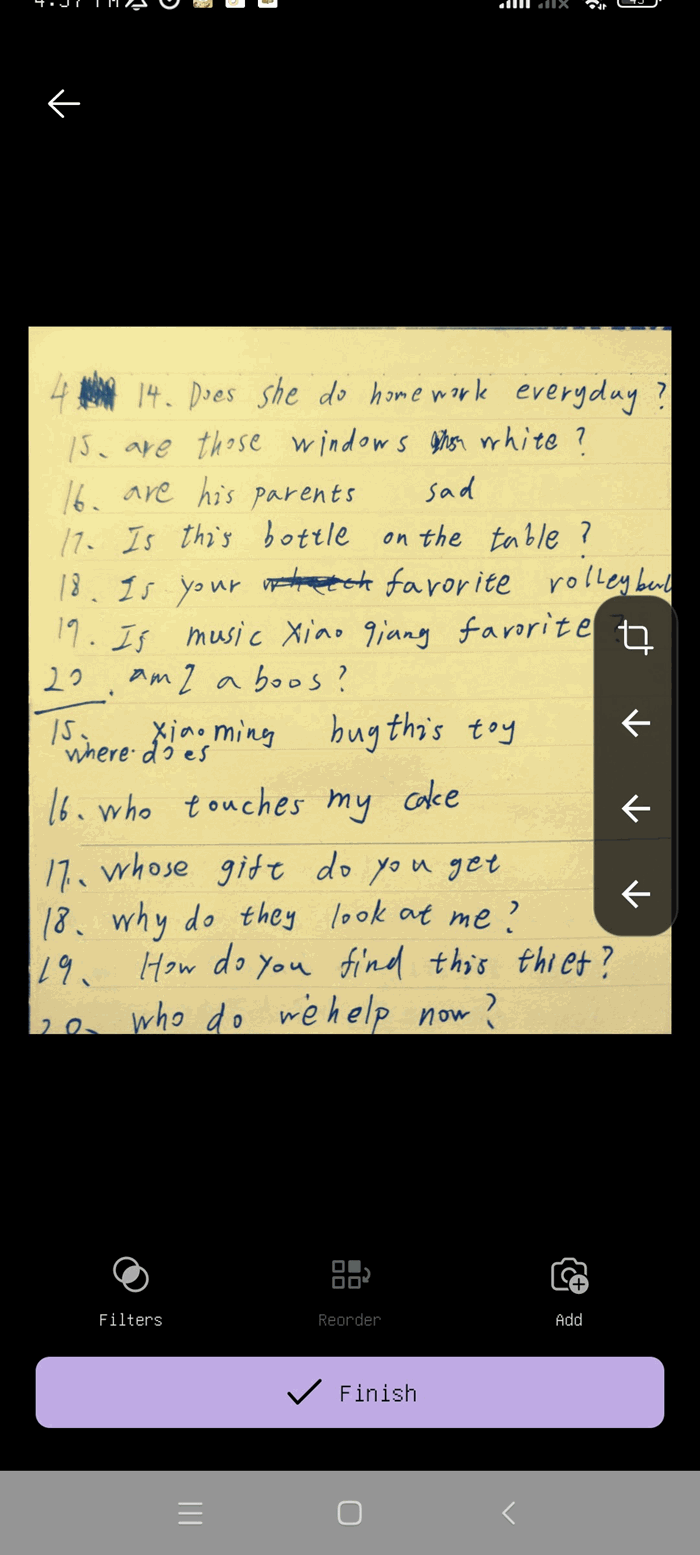
7. When you have finished editing, tap [Finish] to save the image to Sticky Notes, then tap [Done] again to save.
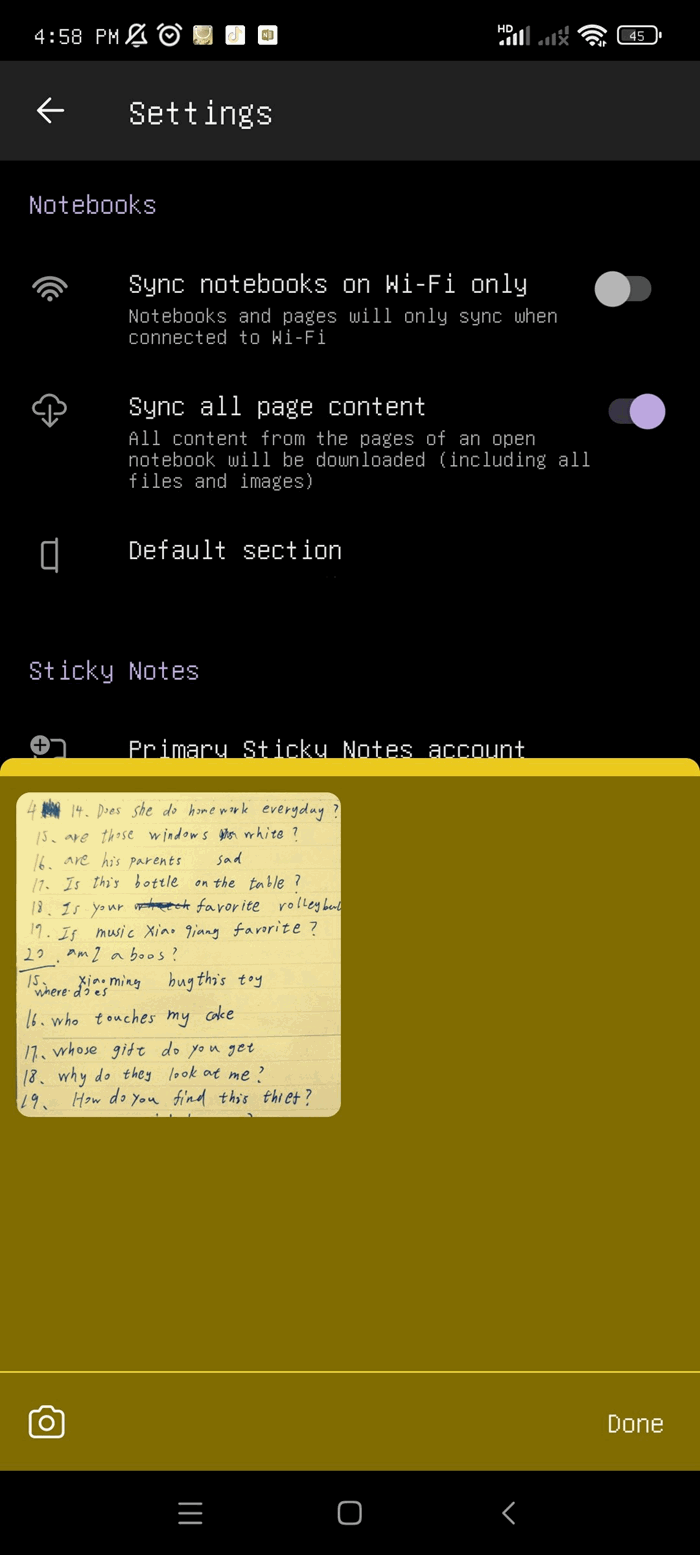
8. The saved photos and content will be stored in Sticky Notes.
6.After choosing the background, tap the screen again to return to the second editing interface.
(Here, choosing [Process] as the background is used as an example. After selection, the entire image background turns yellow.)
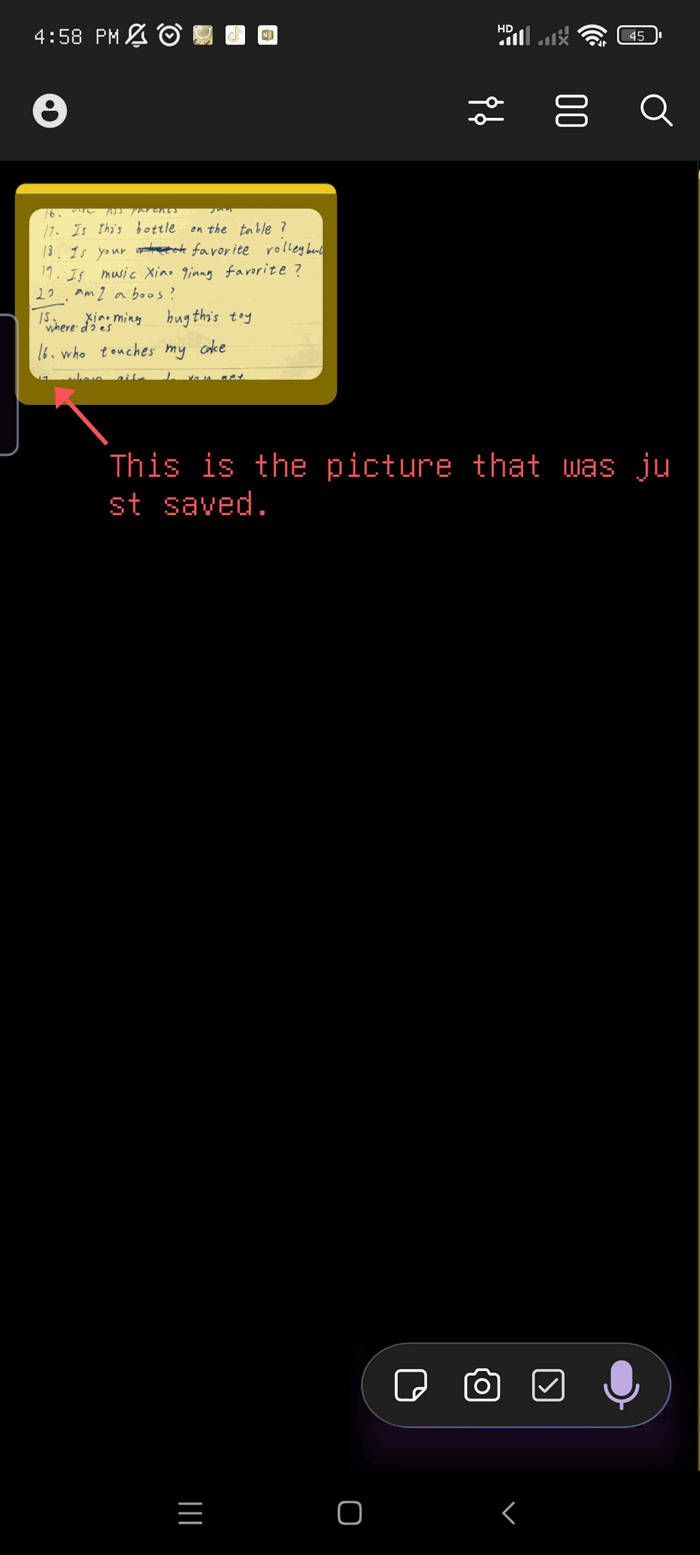
7. When you have finished editing, tap [Finish] to save the image to Sticky Notes, then tap [Done] again to save.
8. The saved photos and content will be stored in Sticky Notes.

